Deploy Hugo Sites to AWS S3 with GitHub Actions
Want to learn how I built this website using Hugo, continuously integrate my code and deploy it using GitHub Actions, and make it highly available with low latency using an AWS S3 Bucket and Content Delivery Network? Check out this tutorial.
Introduction
Using GitHub Actions to build a workflow, I am able to automatically build and deploy my website anytime a change is pushed to the source code repository. This tutorial shows and demos how I have setup the automatic build and deploy workflow for my website McConnellWeb.com. My website is built using the open-source static site generator Hugo and deployed in an AWS S3 bucket.
Step 1: Store your website/application source code in a GitHub repo
Build and store your website or application source code in a GitHub repository. This will be the single source of truth and allow for version control between changes. The source code for my website is stored in this public GitHub repository.
Step 2: Setup a GitHub Actions workflow
From inside the GitHub project repo, click Actions in the menu bar and create a new workflow.
This will allow you to create a new .yml file which are the workflow instructions.
Step 3: Create the workflow instructions
Workflow instructions are grouped into jobs and each job consists of steps that are completed in an order.
There are also instructions telling GitHub Actions when the workflow should run.
The workflow.yml file for my website are attached below.
This workflow has one job called build and deploy which initiates 6 steps.
The top on: push line tells GitHub Actions to run this workflow everytime a change is pushed to the repo.
You can have workflows that only run for changes to specific branches.
name: Continuous Deployment

# When action will run
on: push

jobs:
  # single job called "build and deploy"
  build-and-deploy:
    # The type of server that the job will run on
    runs-on: ubuntu-latest

    steps:
      # Checks-out your repository under $GITHUB_WORKSPACE, so your job can access it
      - uses: actions/checkout@v2
        with:
          submodules: true

      # Installs hugo with the version specified
      - name: Setup-hugo
        uses: peaceiris/actions-hugo@v2
        with:
          hugo-version: '0.72.0'

      # Builds the hugo website
      - name: Build-site
        run: |
          make clean
          hugo

      # Grants action AWS permissions for s3 bucket
      - name: Configure-AWS-credentials
        uses: aws-actions/configure-aws-credentials@v1
        with:
          aws-access-key-id: ${{ secrets.MCCONNELL_WEB_AWS_ACCESS_KEY_ID }}
          aws-secret-access-key: ${{ secrets.MCCONNELL_WEB_AWS_SECRET_ACCESS_KEY }}
          aws-region: us-east-1

      # Deploys the hugo site
      - name: Deploy-site
        run: hugo deploy

      # Logs the completed deployment
      - name: Post-deployment
        run: echo Build completed on `date`
One of the most powerful tools that come with GitHub Actions is the GitHub Marketplace.
You can see in my example workflow above, most steps that are run use an action that someone else created.
For example, in the name: Configure-AWS-credentials step, I am using an pre-scripted action.
This saved me the time of writing the code to assume the correct access credentials.
Step 4: Save and test the workflow
Once you have created the .yml workflow file, commit the changes and, depending on the instructions you provided, trigger the job to run.
For me, this would happen immediately since I configured the workflow to run each time a change was pushed (the commit of the .yml file is a push).
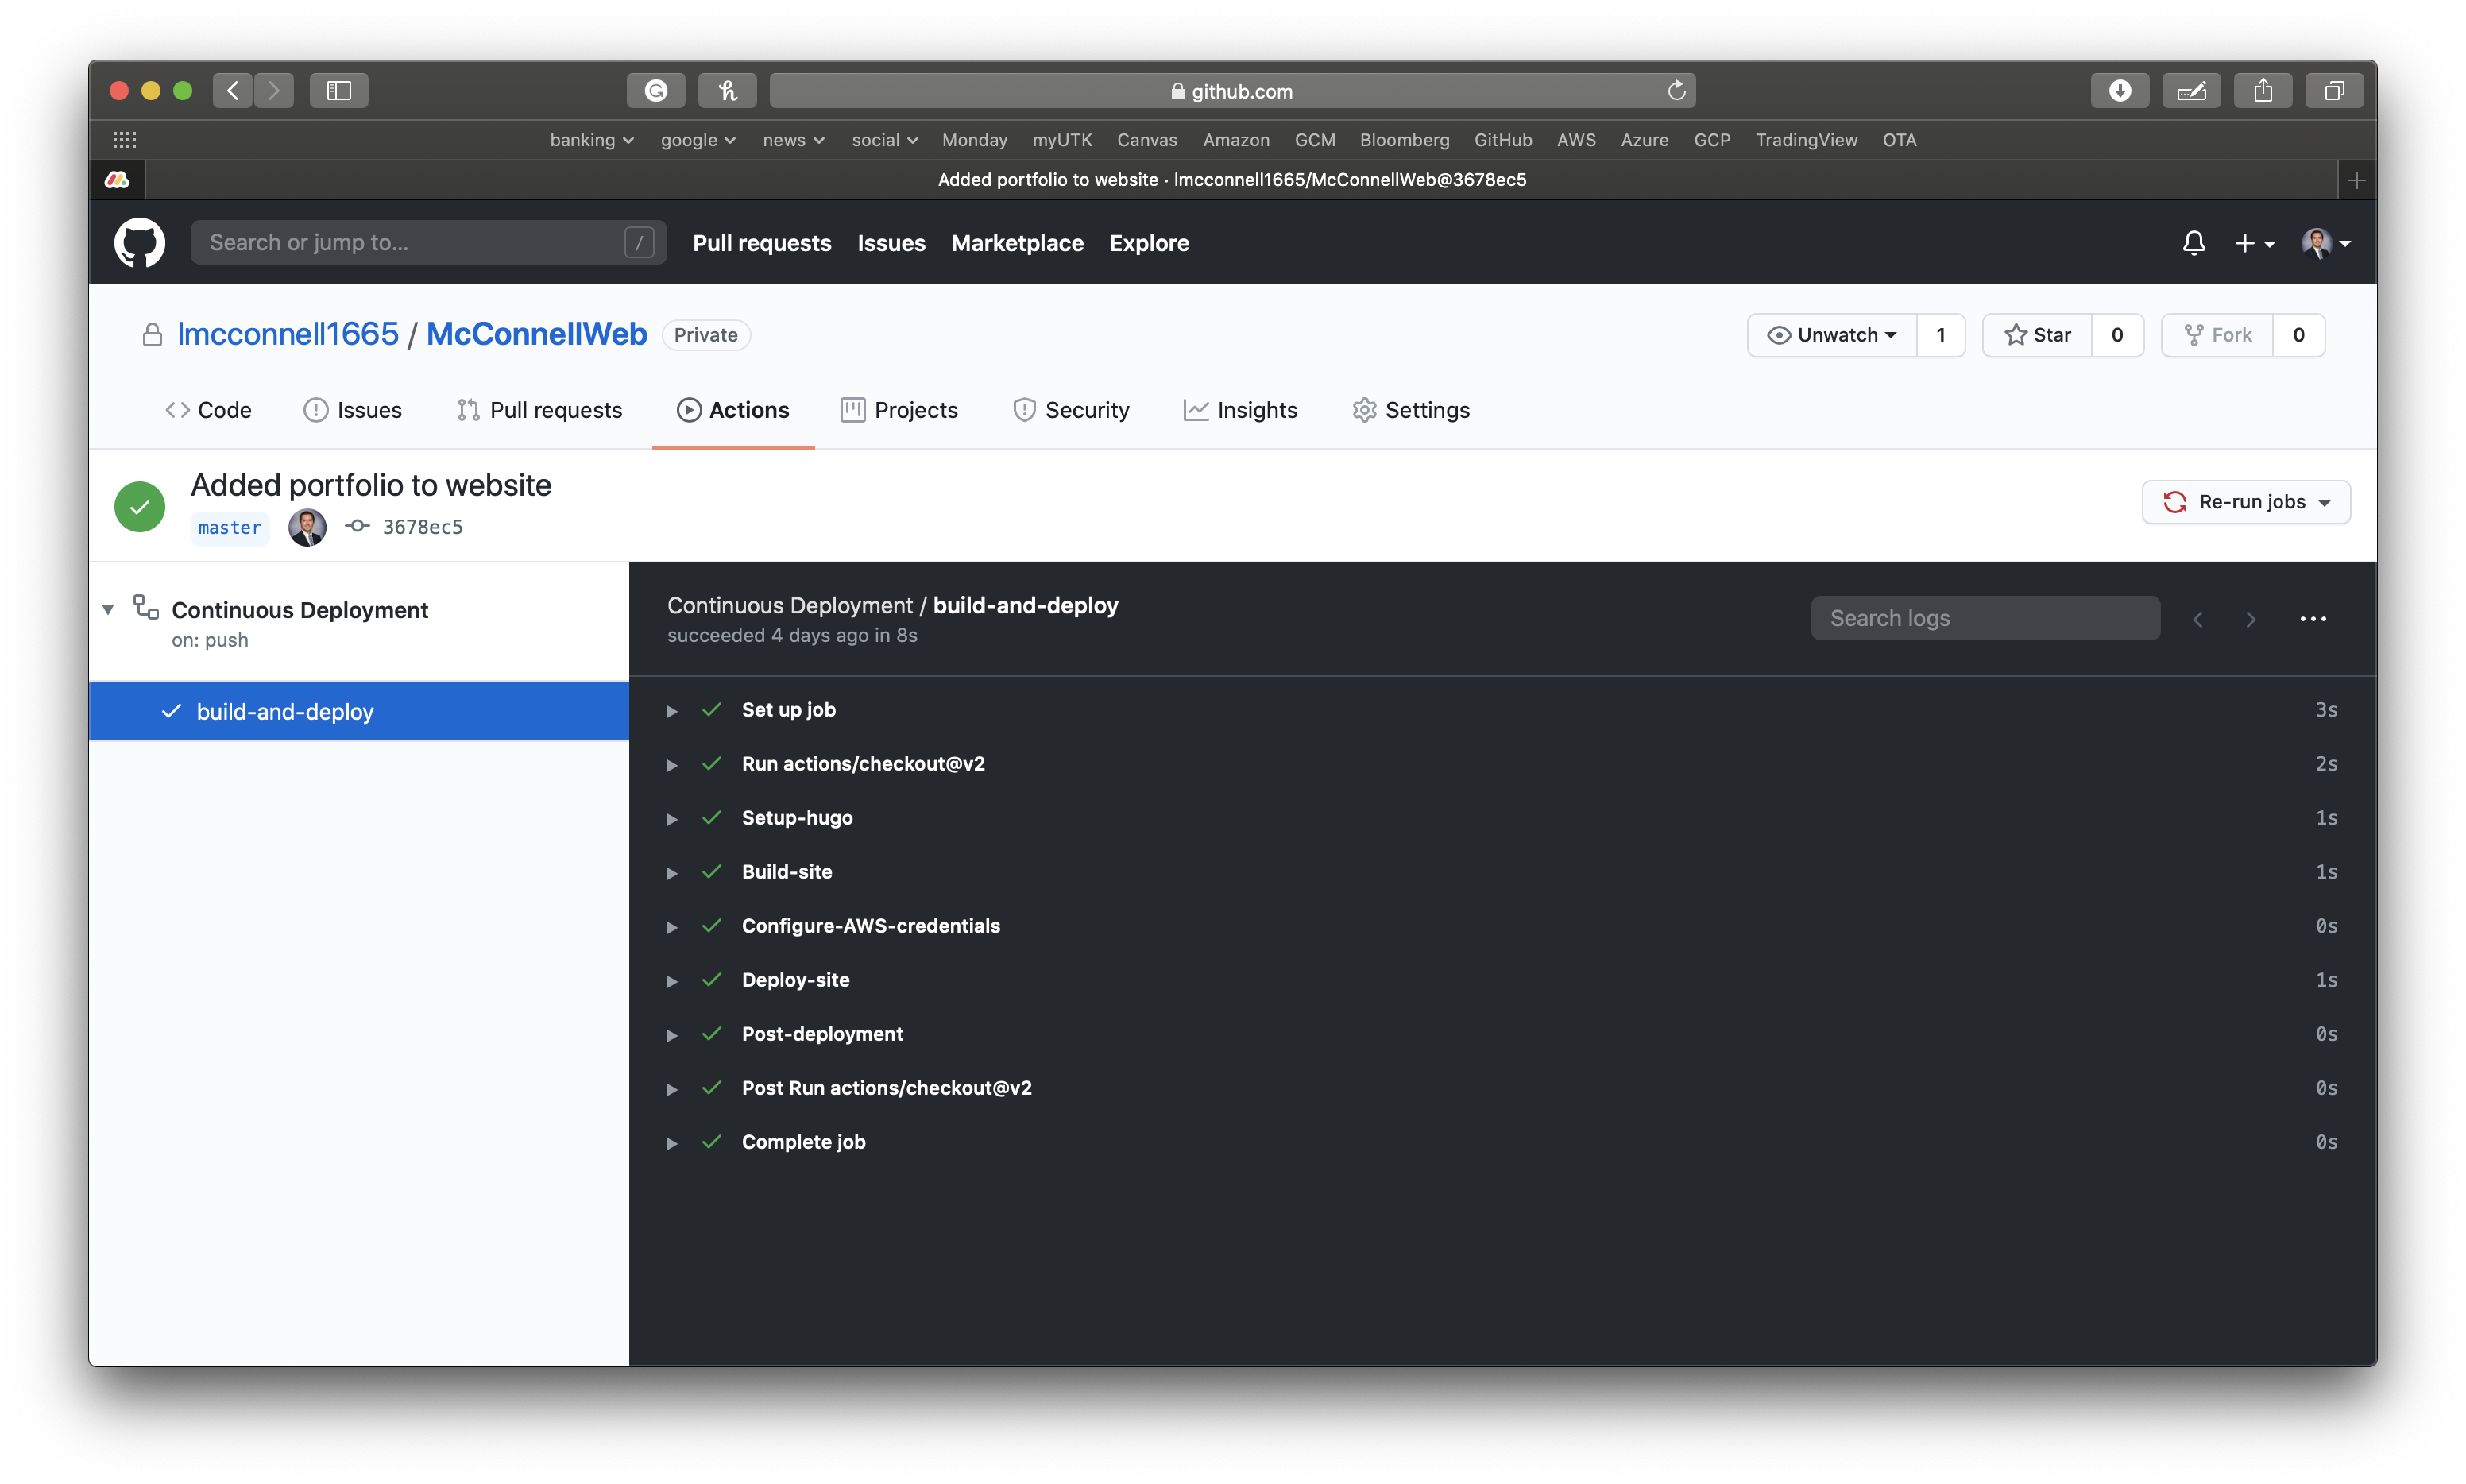
You can follow along in the Actions tab of GitHub to see the progress.
If everything runs properly, you should see a screen similar to the one below.
If there are any problems during any of the steps, the workflow will stop and alert you of where the problem occurred.
This is beneficial because it will stop bad code from being deployed and also give you insight into where the error is occurring.
