Automatically Starting/Stopping a VM with Azure Data Factory
Introduction
One of the key value propositions of cloud computing is only paying for resources when you need them. So why pay for computing power to run your nightly ETL job when the machines only need to run while the pipeline is processing? Using Azure Automation runbooks and the Azure Data Factory webhook this tutorial will show you how to automatically start and stop your virtual machines.
Step 1: Create an Azure automation account
From within the Azure portal, navigate to the Automation Account service and create a new account.
You will need elevated privileges to create this account.
Make sure to create this account within the same subscription and resource group as the virtual machines you want to control.
The Create Azure Run as account option must be set to ‘Yes’.
Step 2: Import the runbooks
Download the two PowerShell scripts from this GitHub repo.
Change the $AutomationRG and $AutomationAcct parameters at the top of each script to match the names of your resource group and the automation account that you created.
From within the automation account in the Azure portal, navigate to the runbooks in the left-hand menu and use the Import a runbook feature to add both Start.ps1 and Stop.ps1.
As you import each runbook you must also publish the runbook. See the screenshot below for an example.

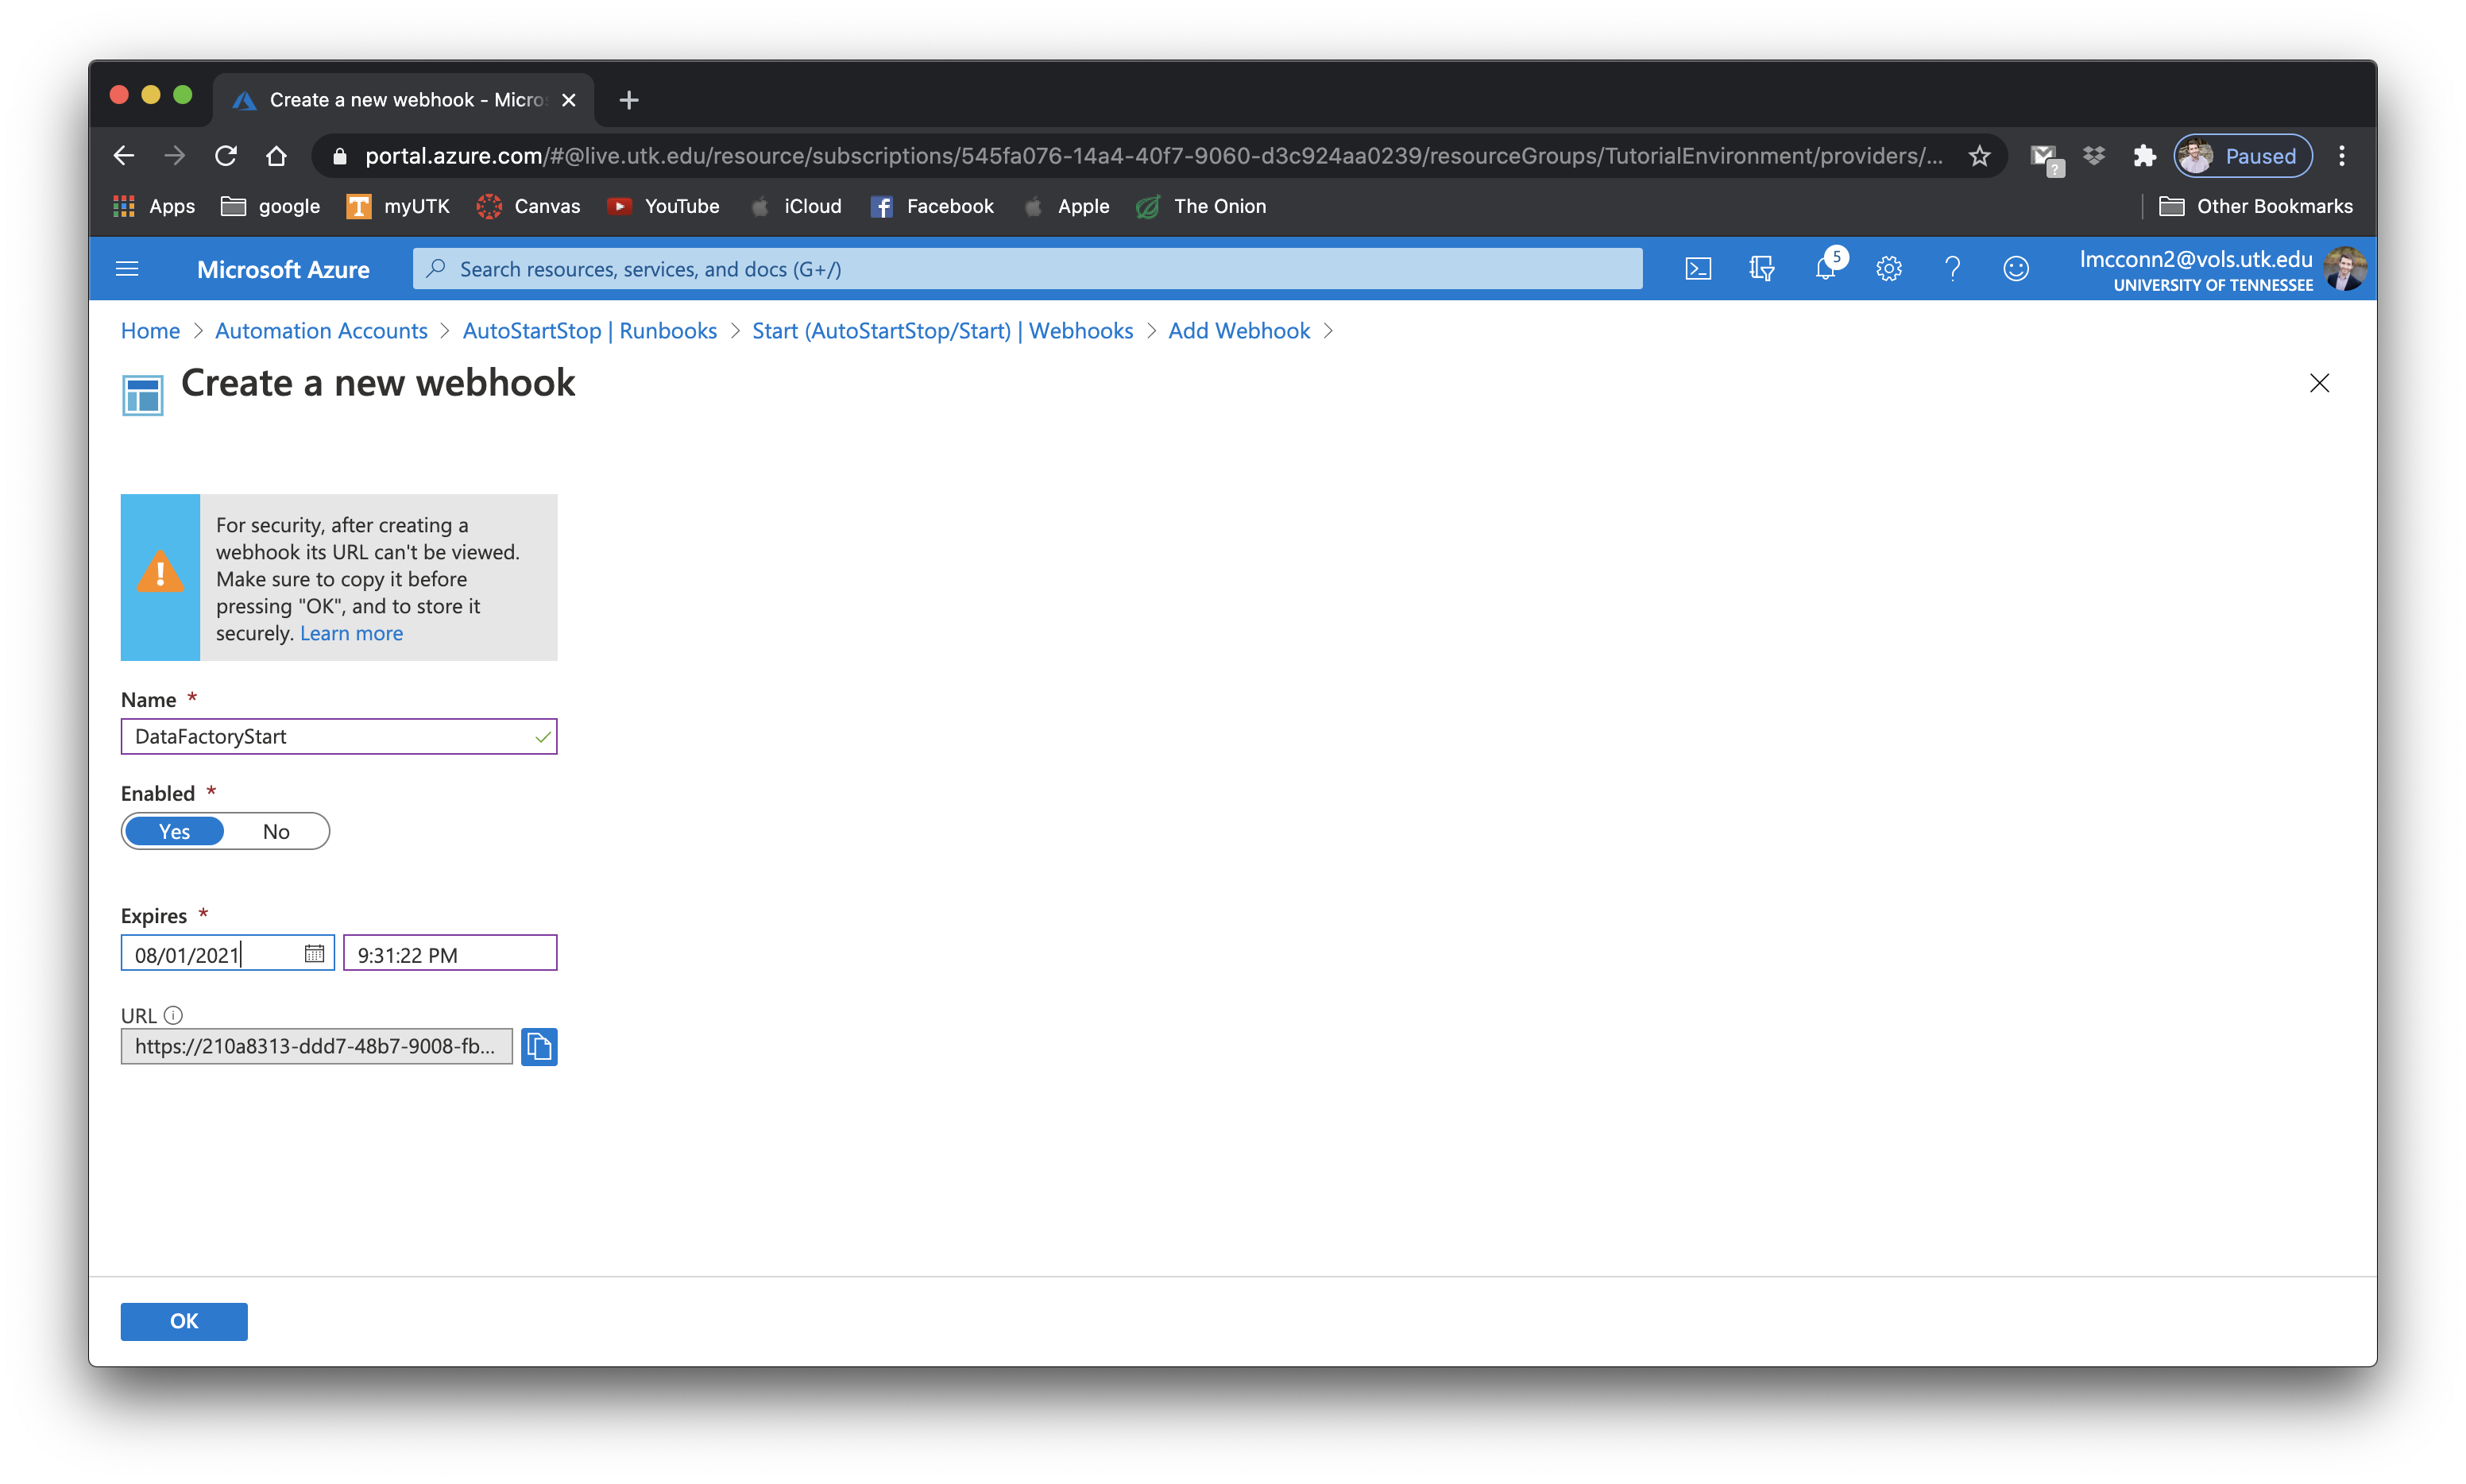
Step 3: Create a webhook
Click on the Start runbook that you just imported and select Webhooks from the left-hand menu.
Add a new webhook and make sure to save the URL that is generated as it can only be seen once.
This URL should be treated as secure credentials and only shared using secure methods.
Select a reasonable expiration date and make sure the webhook is enabled.
If you correctly set your parameters in the scripts before importing you will not need to add an parameters.
This must be done once for both the start and stop runbook.
Save and keep track of which URL is associated with which runbook.
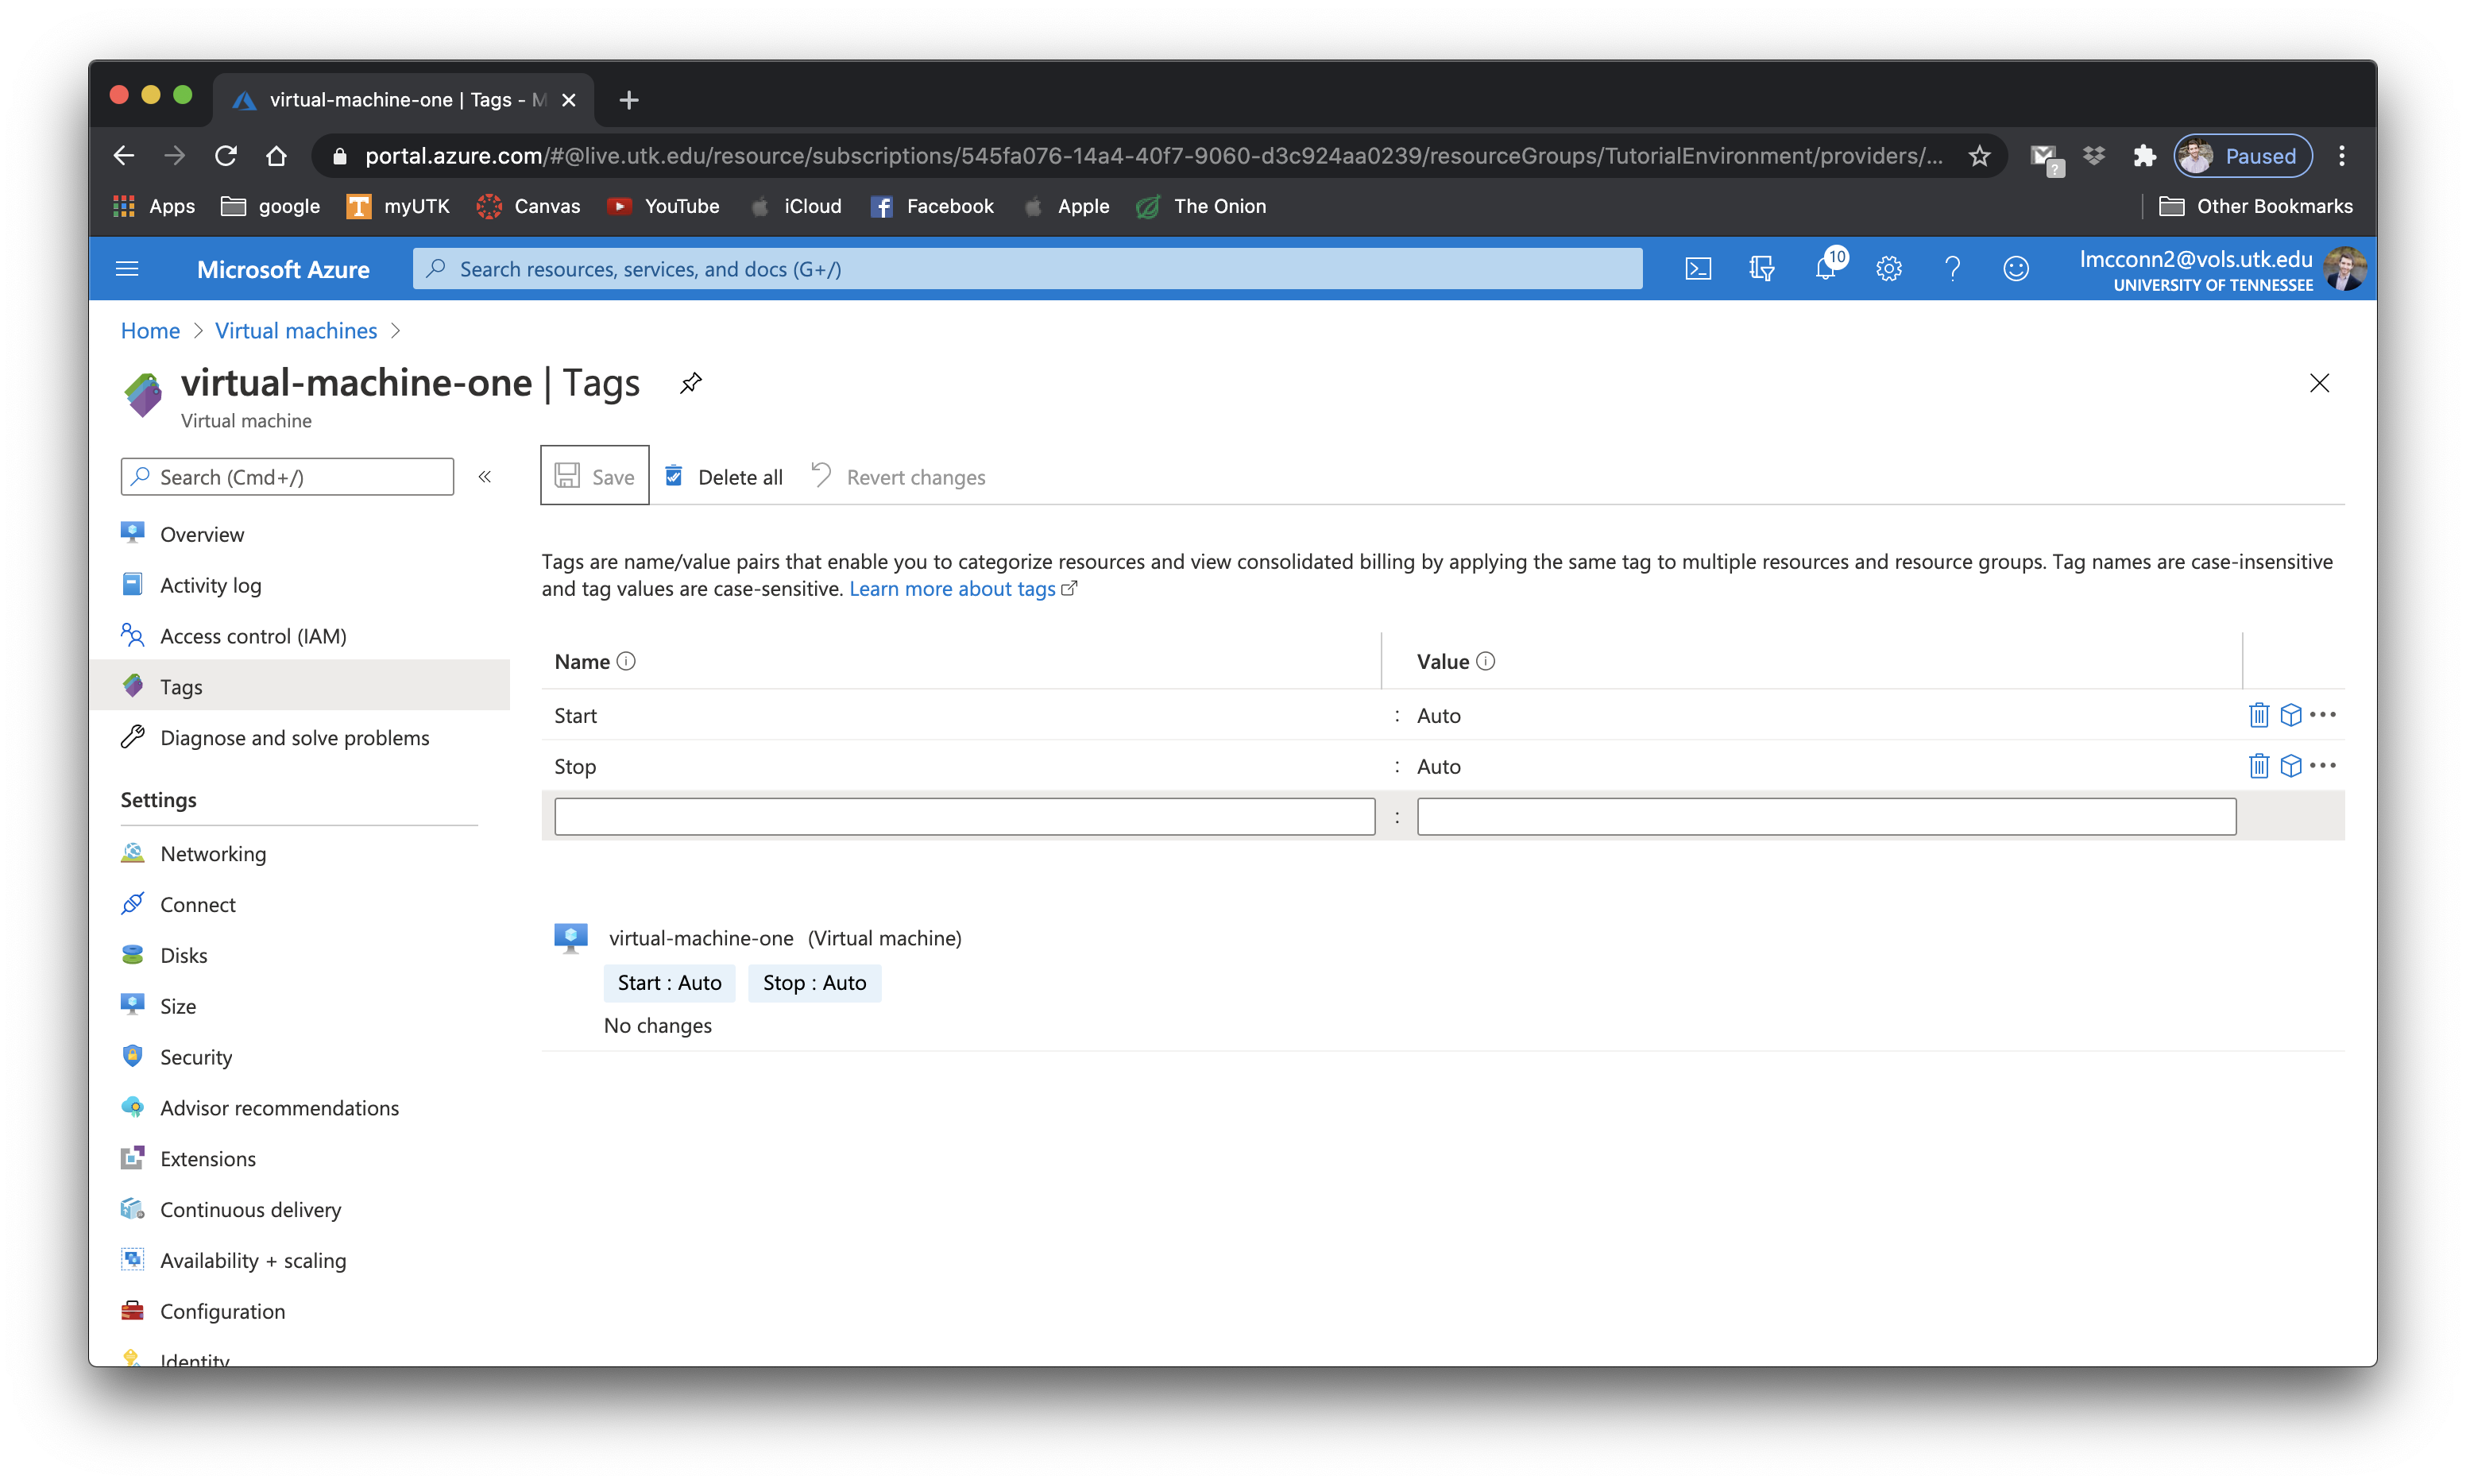
Step 4: Add tags to your virtual machines
These scripts work by searching for virtual machines with the Start and Stop tag keys with the values Auto.
Make sure to only select the virtual machines within your resource group that you want to be automatically turned on and off.
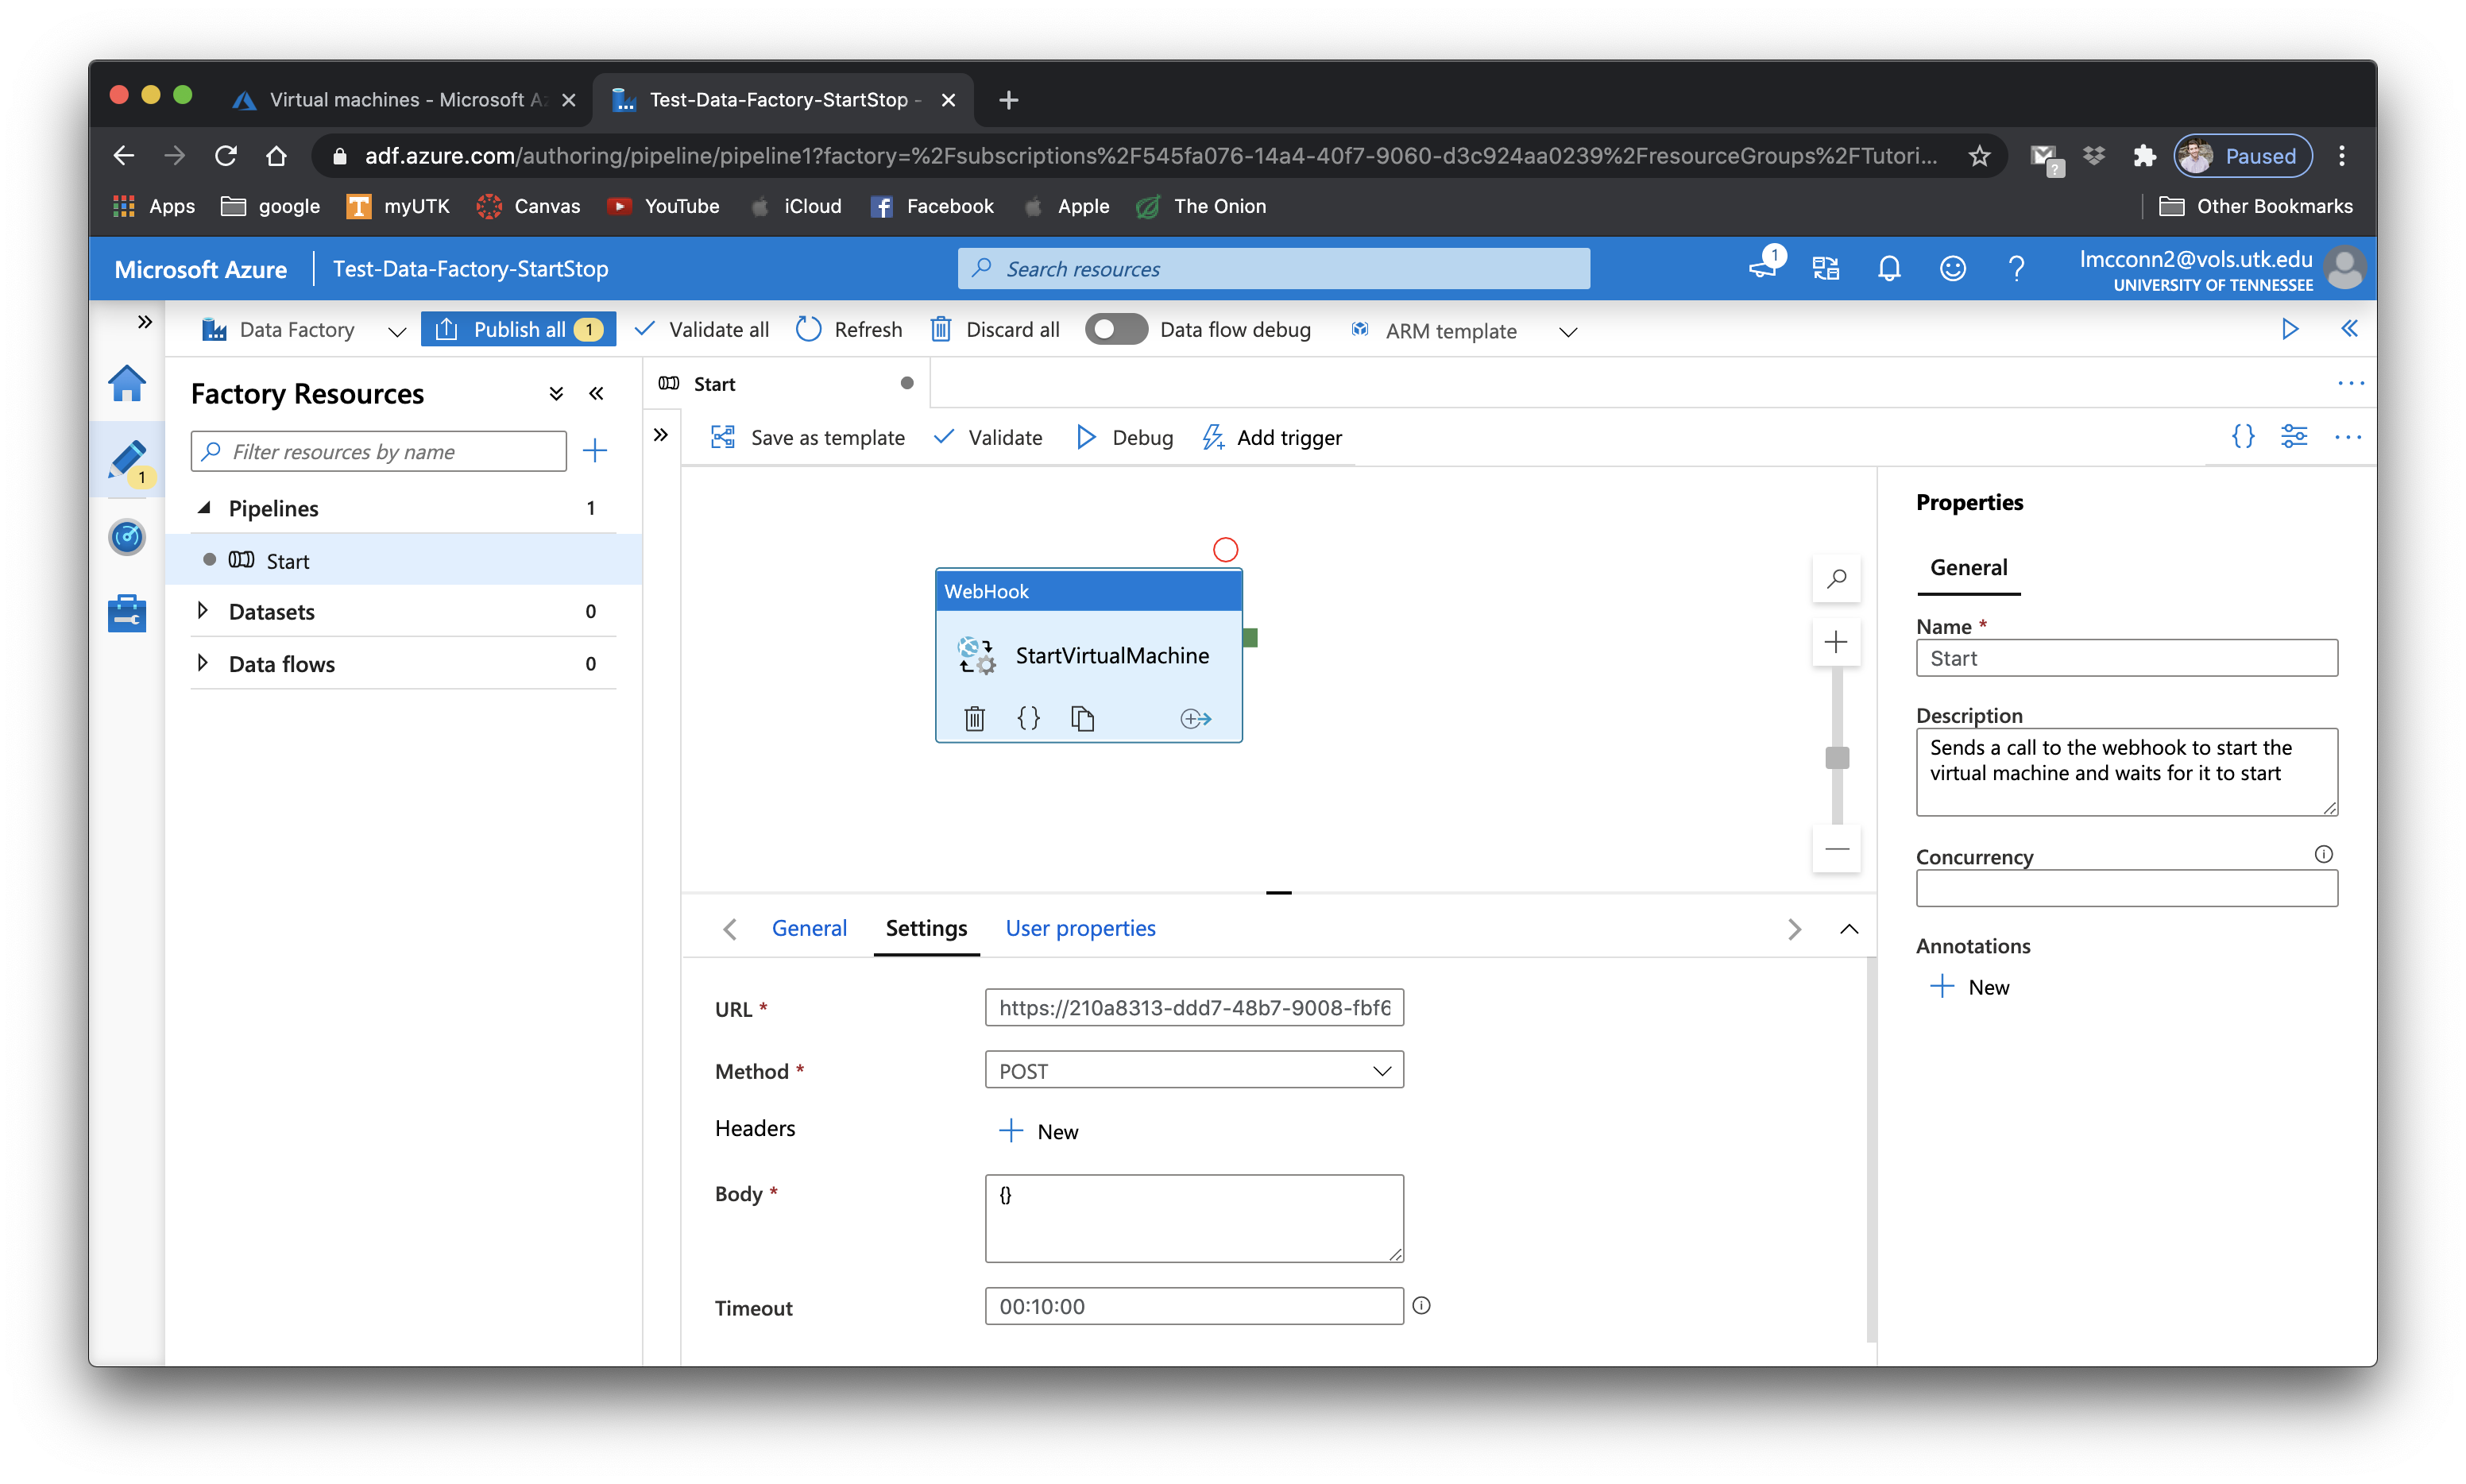
Step 5: Add a webhook activity to your pipeline
Navigate to Azure Data Factory and add a webhook activity step to the beginning of your pipeline.
The URL for this step should be the URL you created in step 3.
The method will be POST and the body will be {}.
Repeat the same process for the stop step at the end of your pipeline.
Step 6: Test the pipeline
Confirm that your virtual machines are stopped and press Debug from within Data Factory to test the runbook.
You can follow along with the output of the runbooks from within the automation accounts job window.
Once the job has successfully completed and the VM has started you will also see Succeeded from within Data Factory.
The pipeline is now ready to be published.